About Testimonial Slider Widget
Want to win the trust of your website visitors and leave an everlasting impression? You can simply display testimonials from your past customers. But it is equally essential to make it attention-grabbing, or else what will be the point of displaying testimonials?
Hence, we bring you a fantastic technique that helps you win customers’ trust and brings charm to your WordPress website. The technique is simple – embed testimonial slider widget on WordPress website. You can also refer to various testimonial reviews examples that bring more charm to the testimonial widget and make this strategy more beneficial.
In this blog, you will learn the simplest way to add Testimonial slider widget to your WordPress website.
Try Tagembed – Create Your Free Account Now
Using Quick Steps On How You Can Embed Testimonial Slider Widget On WordPress Website
Tagembed provides you with multiple Testimonial sliders, like horizontal sliders, review sliders, carousels, and many more. To add them to your website follow these few easy steps:
Step 1: Create A Testimonial Slider Widget With Tagembed
A. Begin with creating an account with Tagembed free tool. If you already have an account on the platform, then log in using your credentials.

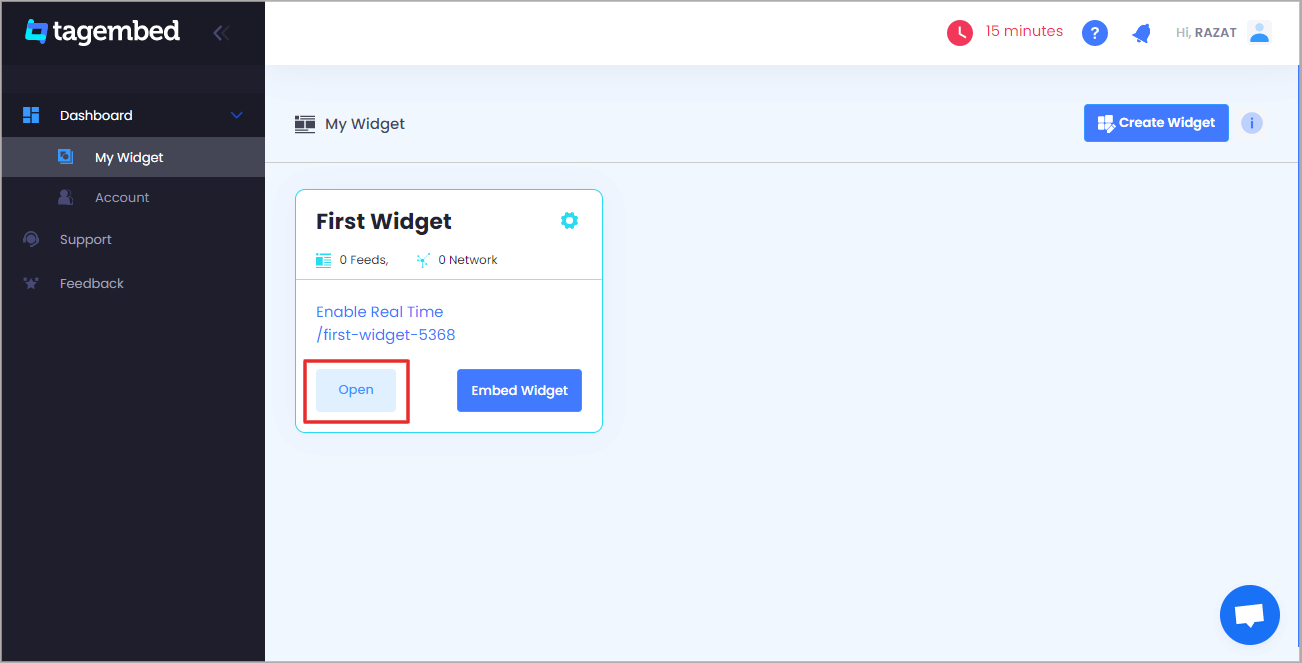
B. If you are a new user then your first widget will be created by default now click on the “Open” button to proceed. And if you are an existing user, then click on the “Create Widget” button present on the top right corner of the screen, and provide the desired name for the widget.
C. Now a new popup will open, click on the Review widget section.

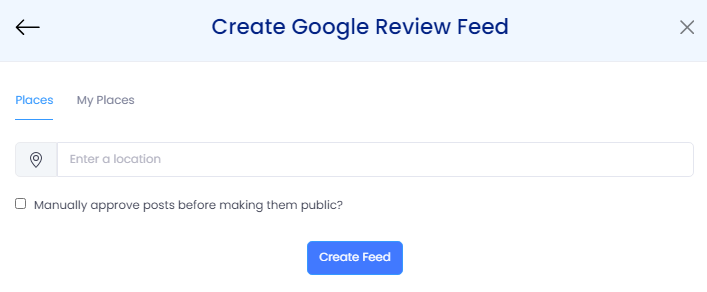
D. Here you have multiple options to choose from review platforms like Google Reviews, Yelp Reviews, Airbnb Reviews, Facebook Reviews, Trustpilot Reviews, Etsy Reviews, and more available on your screen. Select the appropriate source, in this blog, we will be using Google Reviews.

E. A new pop-up will appear on your screen. Select the source which you want to use to collect the Google reviews feed.
Try Tagembed – Create Your Free Account Now
Step 2: Add Testimonial Slider Widget On WordPress Website
A. Click on the “Personalize” section and choose the “Themes” from the Tagembed dashboard menu.

B. You will see a bunch of different types of Testimonial widget examples. Click on “Classical Carousal (Testimonial Slider)” and click apply theme.

Also, Read – Embed Instagram Slider Widget On WordPress
Step 3: Generate A Embed Code For WordPress Website
A. Now click on the “Embed widget” button present in the bottom left corner of the widget editor.

B. Next, you need to select your website building platform from the pop-up menu and choose WordPress.

C. Now you also have the option to adjust the height and width of the Testimonial Slider Widget to modify it as per the look of your WordPress website.

D. Now click on the copy code option and copy the generated embed code on a clipboard and paste this embed code onto the backend of the WordPress website, webpage, and blog where you wish to display the Testimonial Slider Widget.
Congratulations, now your Testimonial Slider Widget is embedded on your WordPress website!
Try Tagembed – Create Your Free Account Now
Still have questions or need help, please Contact Us or write us at support@tagembed.com