How To Create a Google My Business Account?
If you run a search on Google for pretty much any local business, whether it’s a dentist two blocks away or a bakery in the next town over, the results that show up above the regular blue links are Google Business Profiles. That box with the star rating, the hours, the photos, and the “Directions” button is often the first real impression a customer forms of a business, and in a lot of cases, it’s the only one they need before deciding to call, visit, or scroll past.
A Google Business Profile is free, it takes about a few minutes to set up, and yet a huge number of small and mid-sized businesses either haven’t claimed theirs or have left it half-finished with no photos, a stale description, and reviews that go unanswered for months. That gap is exactly why the businesses that do get this right pull so far ahead in local search.
This guide explains how to create a Google My Business account, set up a Google My Business profile, verify your listing, optimize it for local SEO, and make the most of customer reviews.
TL;DR
- A Google Business Profile (formerly Google My Business) is a free Google listing that controls how your business shows up in Google Search and Maps, including your name, address, hours, photos, and reviews.
- Setting one up involves creating a Google account, claiming or adding your business, choosing an accurate category, verifying ownership, and filling in details like hours, description, and photos.
- Verification is usually done by video, phone, or postcard, and your listing won’t appear publicly until it’s complete.
- Reviews are one of the strongest local ranking signals, and responding to them matters almost as much as collecting them.
- Google reviews don’t have to live only on Google. Pulling them onto your website through a review widget or social media aggregator extends their reach and adds fresh, trust-building content to pages that would otherwise sit static.
- Tools like Tagembed let you fetch your Google reviews, moderate them, and embed them on any website in a few steps, no developer needed.
What Is a Google Business Profile?
A Google Business Profile is a free business listing that determines how your business appears across Google Search, Google Maps, and Google’s local results, sometimes called the “Local Pack” or “Map Pack.” It replaced what used to be called Google My Business, though the two names are often used interchangeably even now.
At its core, the profile holds the basic facts a customer needs before deciding to engage with a business: name, address, phone number, website, category, hours, and photos. But it’s grown into something closer to a mini-website that lives directly inside search results. Through it, you can post updates and offers, answer customer questions publicly, message customers directly, list products or services, and, importantly, collect and respond to Google reviews.
For any business that wants to be found by people searching nearby, whether that’s “coffee shop open now” or a branded search for the business name itself, this profile is usually the first thing Google shows. Getting it filled out completely and kept current is one of the highest-leverage things a business can do for local visibility, and unlike most SEO work, it doesn’t require writing a single line of code.

Google Places
Reviews

Google My Places
Reviews(GMB)
How to Set Up a Google My Business Profile Account?
Here is the guide on how to create a Google My Business account. Follow each step, and by the end of it, you will have your own Google My Business account.
1. Check if your business already exists on Google Maps
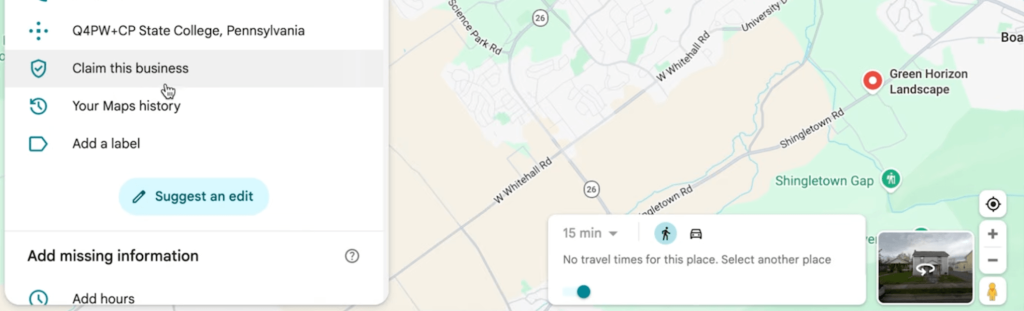
Before creating a new profile, search for your business on Google Maps. In many cases, Google automatically creates listings using publicly available information.
If your business appears, click Claim this business and complete the verification process instead of creating a duplicate listing. If it doesn’t exist, head to Google Business Profile and start a new profile.
2. Sign in with a dedicated business Google account
Use a Google account dedicated to your business rather than a personal email. This makes it easier to transfer ownership later if your business grows or another employee manages your profile.
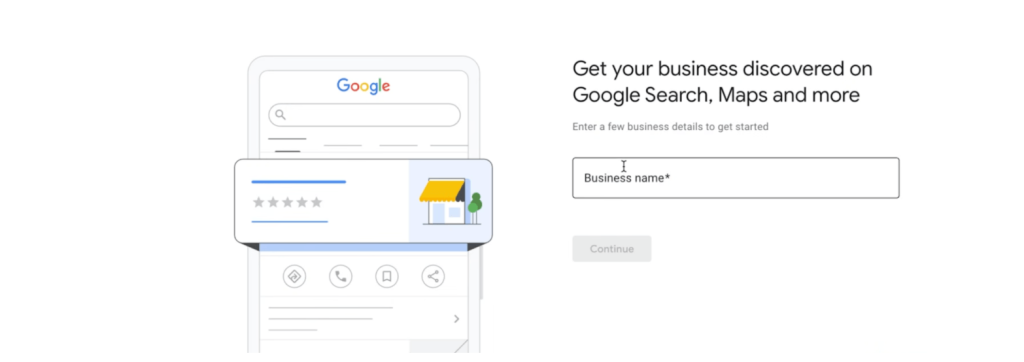
After signing in, click Start now button present on the top right corner of the screen, and enter your business name exactly as customers know it.
3. Choose your business type
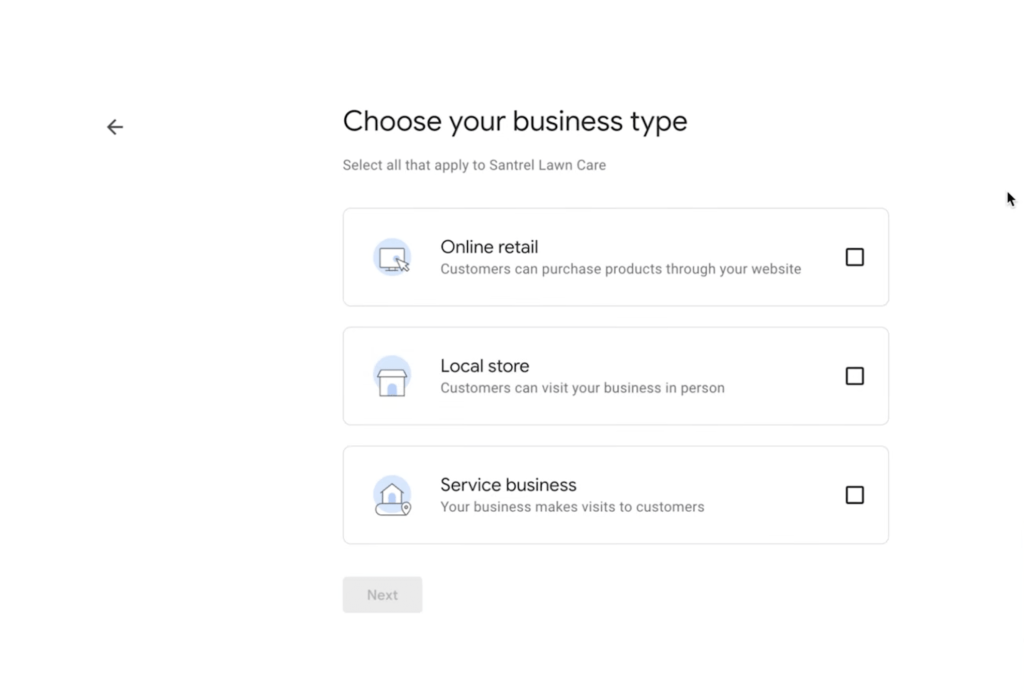
Google lets you choose how your business operates. Depending on your business, you can select one or more options:
- Local store (customers visit your location)
- Service business (you travel to customers)
- Online retail (sell products online)
Selecting the right business type helps Google display your profile correctly in Search and Maps.
4. Select your business category
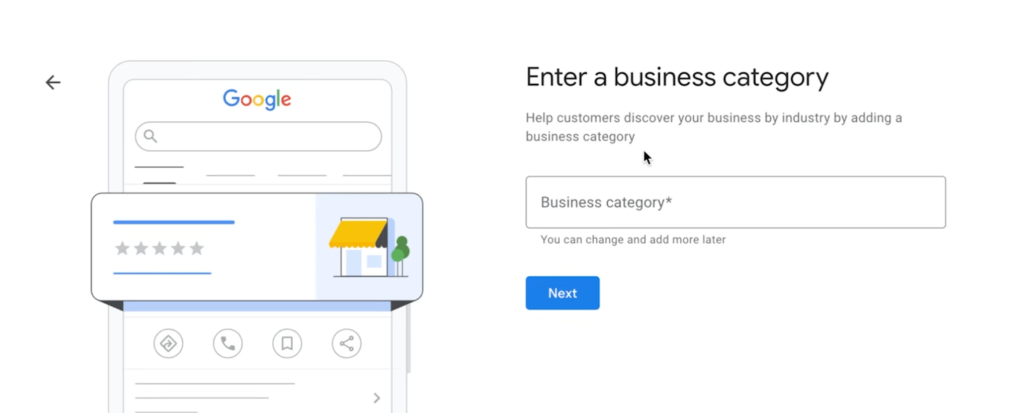
Choose the category that best describes your business. Your primary category tells Google what your business does and plays an important role in determining which searches your profile appears for.
If you can’t find an exact match, choose the closest relevant category. Additional categories can always be added later.
5. Define your service area (if applicable)
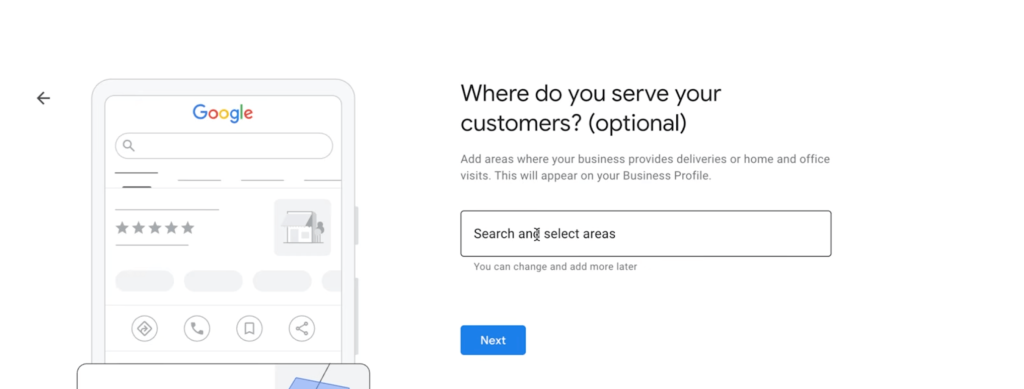
If you run a service-area business like a plumber, electrician, landscaper, or cleaning service, tell Google where you serve customers.
Add only the cities or towns where you actually provide services. Avoid selecting an unrealistically large service area, as Google expects your coverage to reflect your real operations.
6. Add your business contact details
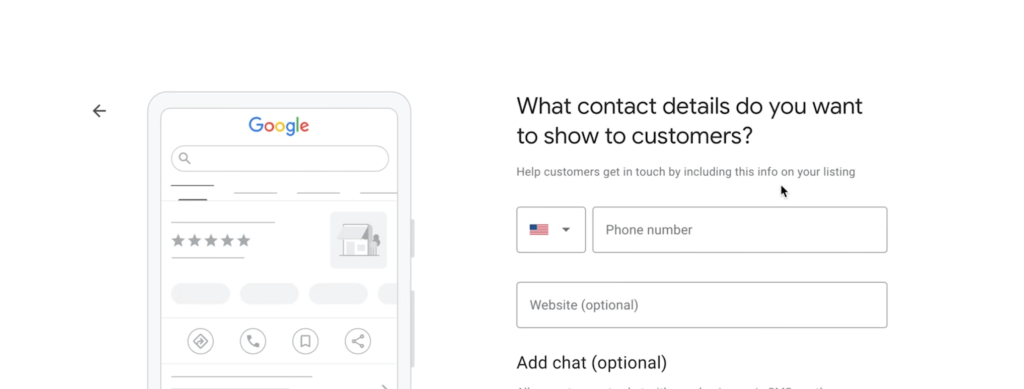
Enter the phone number customers should use to reach you and add your website if you have one.
A website isn’t mandatory, but it helps customers learn more about your business and often increases trust. Make sure all contact information is accurate, as it will be publicly visible.
7. Add your business location and verify your profile
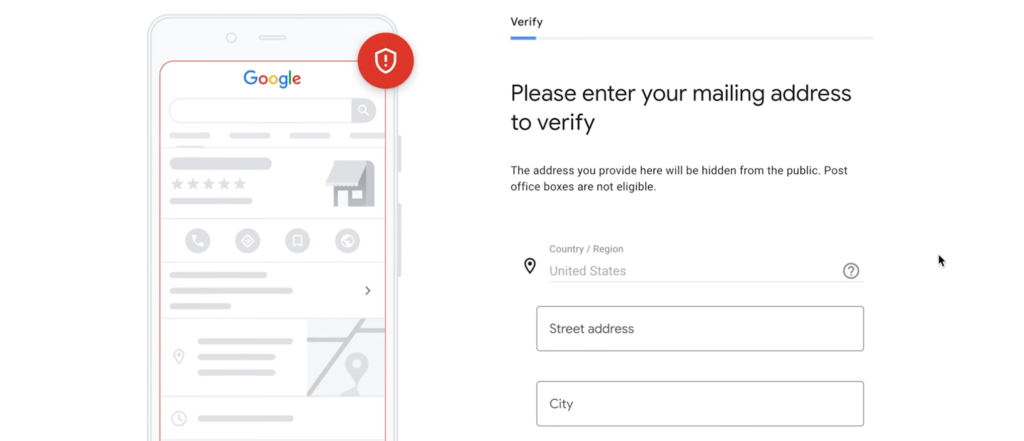
If customers visit your location, enter your business address accurately so Google can place it on Maps.
Next, verify your business ownership. Depending on your business and location, Google may verify your profile using:
- Phone or text verification
- Video verification
- Postcard verification by mail
Google decides which verification methods are available. Once verification is complete, your profile becomes eligible to appear in Google Search and Maps.
8. Add your products or services
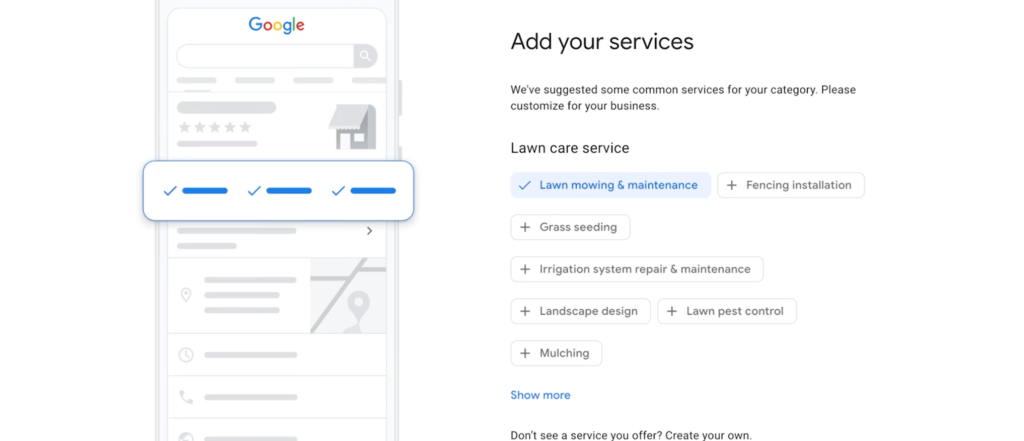
List every product or service your business offers. Don’t stop at one or two, include all relevant offerings.
A detailed service list helps your profile appear when customers search for specific services, making it easier for the right audience to discover your business.
9. Set your business hours
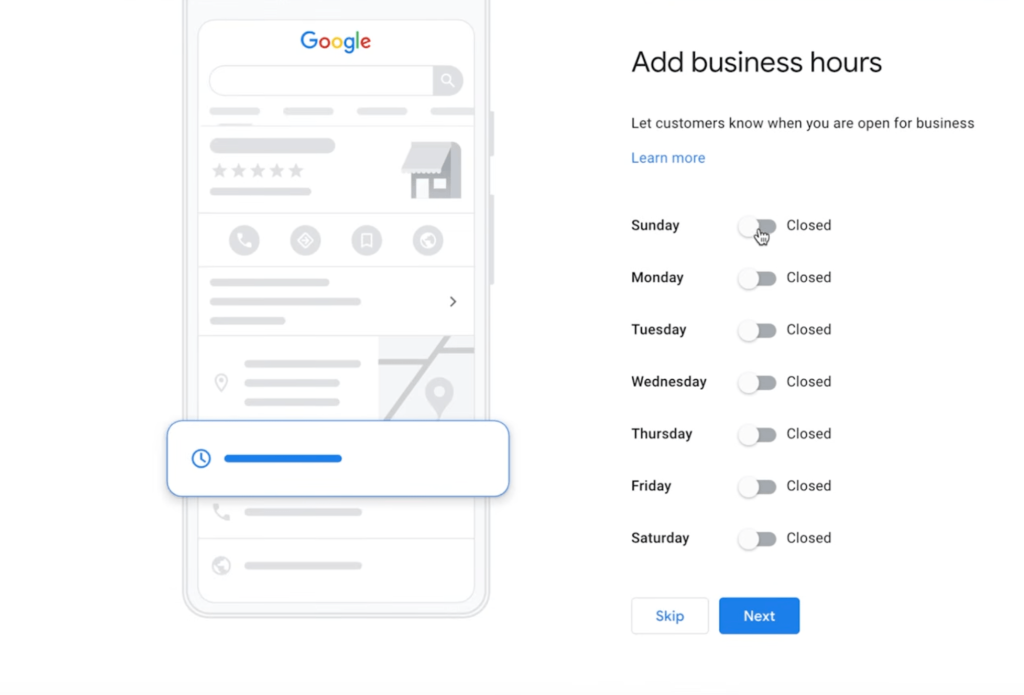
Add your regular business hours so customers know when you’re available.
If your hours change during holidays or special occasions, keep them updated to avoid confusing customers and to maintain an accurate profile.
10. Write a compelling business description
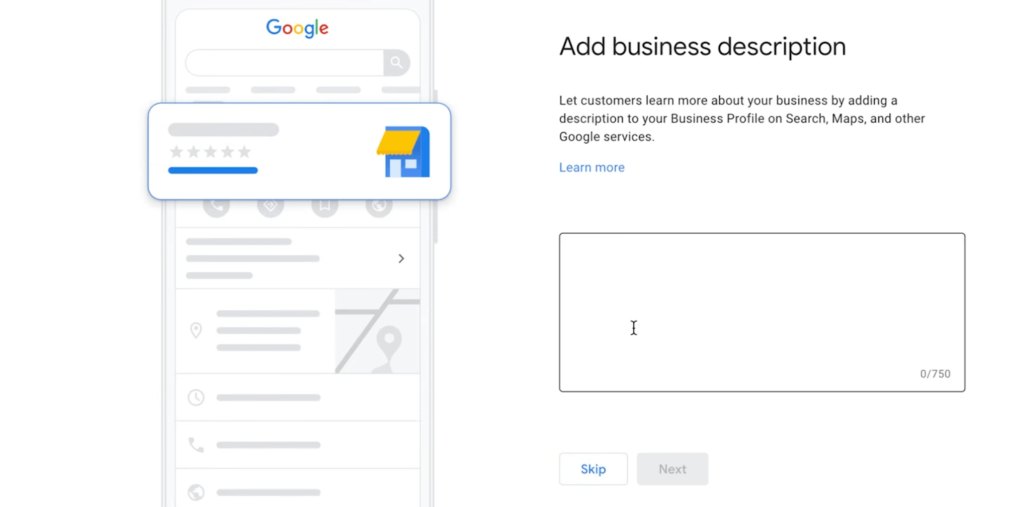
Use the business description to explain what your business does, what makes it different, and the services you provide.
You have up to 750 characters, so focus on useful information rather than promotional language. Mention your experience, specialties, and what customers can expect.
11. Upload high-quality photos
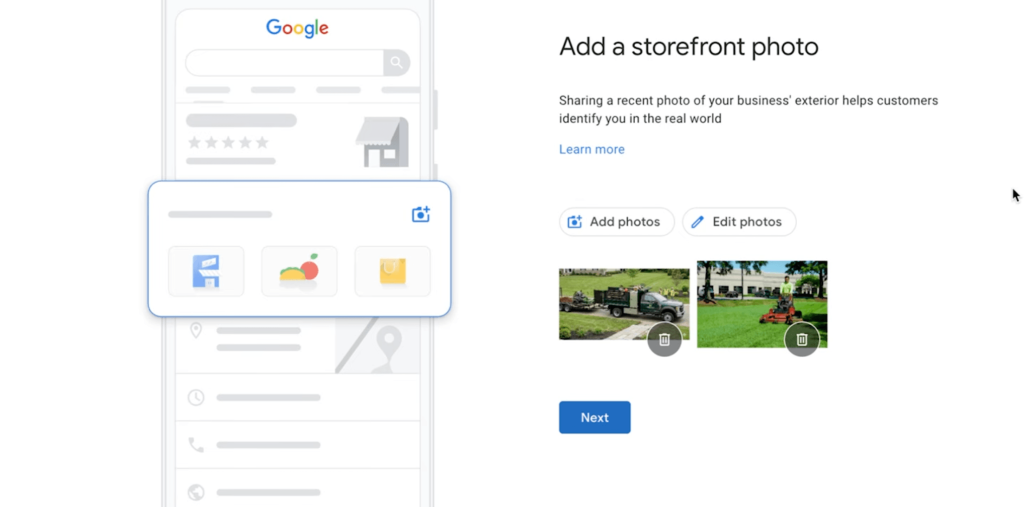
Photos help customers recognize and trust your business before they visit.
Add:
- A storefront or office photo (if applicable)
- Your logo
- Team photos
- Product or service images
- Photos of completed work
Starting with several quality photos gives customers a better first impression while encouraging future visitors to contribute their own images.
12. Manage and optimize your profile regularly
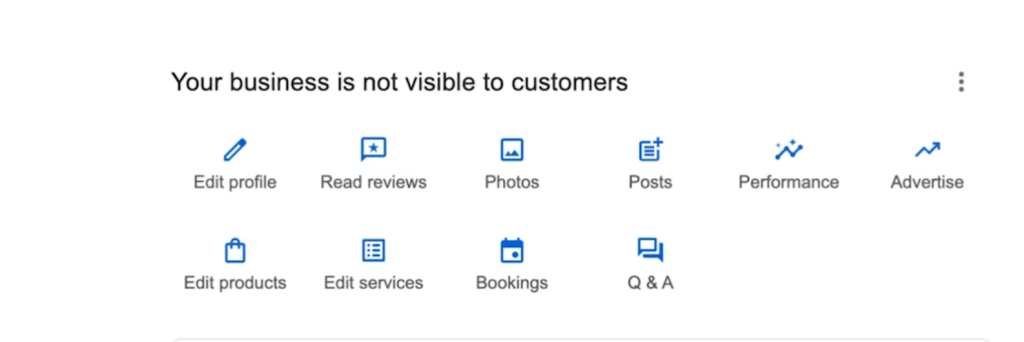
Once your profile is verified, continue updating it instead of leaving it untouched.
Respond to customer reviews, upload new photos, update your services and business hours, publish posts, and monitor your profile’s performance. An active, well-maintained profile provides a better customer experience and helps you get the most out of your Google Business Profile.
Ways to Showcase Google Reviews Beyond Your Profile:
A completed profile with strong reviews does a lot of work inside Google Search and Maps. But those reviews are still sitting on a page that isn’t yours, and a customer has to actively search for the business or click through to see them. The more effective approach is to bring that social proof to where buying decisions actually happen: the business’s own website.
Here are a few ways businesses commonly do this:
1. Manually copying reviews into testimonial pages
This is the lowest-effort starting point: quotes pasted onto an “About” or “Testimonials” page. It works in a pinch, but it’s static, easy to forget about, and doesn’t reflect new reviews as they come in. But there is a catch: you need to add reviews to the website one by one and identify and remove fake Google reviews.
2. Using Google’s own review link and QR code
Google generates a shareable review link for every profile, which is useful for asking customers to leave a review, but it doesn’t help display existing reviews on a website.
3. Schema markup for star ratings in search results
Adding review schema to a website can make star ratings appear directly in Google’s organic search snippets, which is a smart technical SEO move, though it doesn’t showcase the actual review content to a visitor once they land on the page.
4. Embedding reviews through a widget or social media aggregator
This is where most businesses land once they want reviews to update automatically and actually be visible on-site. A social media aggregator pulls in reviews, and often social posts and mentions from other platforms too, and displays them as a live, auto-updating feed or widget anywhere on a website: the homepage, a product page, or right next to a “Book Now” button. Since the feed pulls directly from the source, new five-star reviews show up without anyone needing to touch the code again. In case you have a WordPress website, you can use WordPress plugins.
This last approach tends to be the most practical for businesses that collect reviews across more than one platform, since it consolidates Google reviews alongside Instagram mentions, Facebook recommendations, or Trustpilot feedback into a single, cohesive display rather than juggling several separate embeds. Tools built for this, such as Tagembed, connect directly to a Google Business Profile, let you filter out anything you don’t want shown, automate Google reviews and hand you an embed code that drops straight into WordPress, Shopify, Wix, Squarespace, Webflow, or plain HTML.
The value isn’t just cosmetic. A live reviews widget gives a website fresh, regularly updated content that search engines tend to notice, and it keeps visitors on the page a little longer as they read recent feedback instead of clicking away to check reviews elsewhere. It also enables you to add Google review badge on website.
How to Showcase Google Reviews on Your Website Using Tagembed?
If a business already has a Google Business Profile with reviews coming in, getting them onto a website takes just a few steps:
- Sign up for a Tagembed account. Choose “Social feeds on website” from the dashboard, fill in basic business details, and verify the email address to activate the account.
- Connect the Google Business Profile. Add a new feed, select Google as the source, and choose the correct listing from “My Places” or by searching “Places” if managing a location on someone else’s behalf.
- Moderate the reviews. Use the built-in moderation panel to hide anything irrelevant or unwanted and keep the widget showing only the reviews worth putting in front of customers.
- Customize the widget’s look. Pick a layout, be it a sliding carousel, grid, list, or a compact rating badge, and adjust colors and fonts so it matches the site’s existing design rather than looking bolted on.
- Generate the embed code. This produces a short snippet that pulls live from the connected Google profile going forward.
- Paste the code onto the website. On WordPress, this usually means adding a Custom HTML block; on Shopify or Squarespace, it’s a Code block within the page editor; on Webflow, it drops into an embed element. Most builders make this a copy-paste operation with no development work involved.
- Publish and check placement. The homepage and pages closer to a purchase decision, like checkout or a service booking page, tend to get the most value from a visible reviews widget, since that’s where a hesitant visitor most needs the extra reassurance.
Once it’s live, the widget stays in sync automatically. Every new review posted on the Google Business Profile shows up on the website without anyone needing to edit the embed again, which is really the whole point: reviews that keep working for the business instead of sitting one click away on a different platform.
Conclusion
Knowing how to create a Google My Business account is one of the easiest ways to improve your local visibility. Once you’ve finished setting up your Google Business Profile and optimized it with accurate business information, photos, and reviews, you’ll be better positioned to attract local customers.
Bringing those reviews off Google and onto the business’s own website, whether through a simple widget or a fuller social media aggregator setup, closes the loop. It puts the same trust signal that’s working in search results directly in front of visitors at the exact moment they’re deciding whether to buy, book, or call.
Frequently Asked Questions
Yes. Creating, verifying, and managing a Google Business Profile costs nothing. Some businesses choose to pair it with paid Google Ads, but that’s entirely optional.
Yes, at any time. Hours, photos, descriptions, phone numbers, and categories can all be updated through the profile dashboard whenever something changes.
Video and phone verification are usually near-instant once submitted. Postcard verification, where offered, can take one to two weeks to arrive by mail.
Each physical location needs its own verified profile, though Google offers bulk management tools for businesses handling several locations at once.
Yes. The volume, recency, and rating of reviews are among the stronger signals Google’s local algorithm weighs, alongside how actively a business responds to them.
Embed social feed from Facebook, YouTube, Instagram, Twitter on your website, like a PRO
Invalid Email Address Multiple Themes